Step 1 - add lat. & long. columns
Click here to download the complete files for all steps in this tutorial.
Unzip the tutorial files to a directory on your computer. Start up ODL Studio, select open file, navigate to this directory and open the Excel sheet input data.xlsx. Open the Customers table using the table panel – either by double clicking on the table name or right clicking on it and using the pop–up menu – and examine the data. As you can see, the data has no columns for latitude and longitude.
Using the tables panel on the left, ensure the Customers table is selected and then select the Edit table schema option, either by right-clicking on the table name or clicking on this button:

The table schema editor should now appear. Press the button in the toolbar on the bottom left of the table schema to add a new column (this button is shown on the next screenshot). A new column will now appear on the bottom. Click on the column’s name and rename it Latitude. Then click on the column’s type and select double from the drop-down list; this tells ODL Studio to treat the column as a floating point decimal number. Your dialog should look similar to the following screenshot:
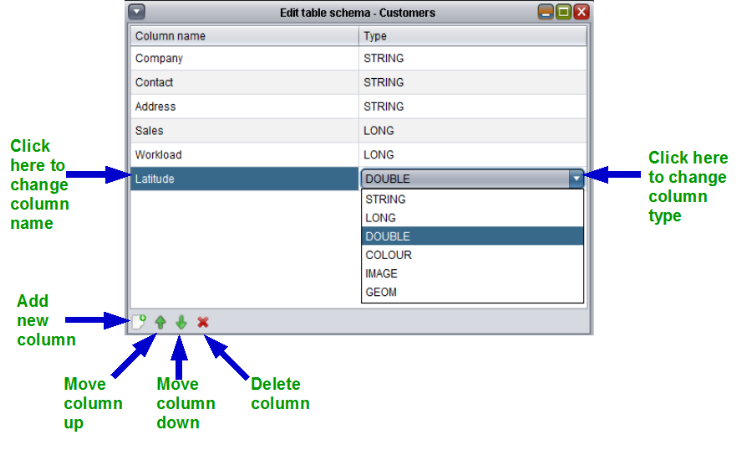
Repeat the process to add a Longitude column, also with type double.
Tip – ODL Studio will run faster if you set the column type correctly on your data.
When you load a spreadsheet into ODL Studio for the first time, it will make a best guess of the column type based on your data. It is recommended that you check the column type the studio has assigned and amend it if needed.