Step 3 - per-customer images
Click here to download the complete files for all steps in this tutorial.
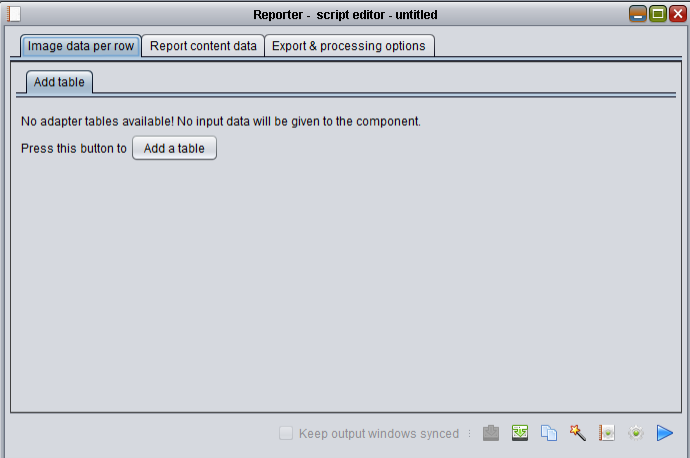
We will now add a detailed image of each customer’s location to the report. To do this we define another show map-style data adapter. Click on the tab at the top of the script editor with the title Image data per row (shown as just ‘Map’ in later versions of ODL Studio). You will now see the following:
Press the Add a table button and in the dialog that pops up, select the Customers table as the source table and the Drawables table (called DrawableObjects in ODL Studio version 1.0.0) as the destination table. A data adapter table will then appear, for you to define the map view for individual customer points. Configure the adapter exactly as shown in the following screenshot:
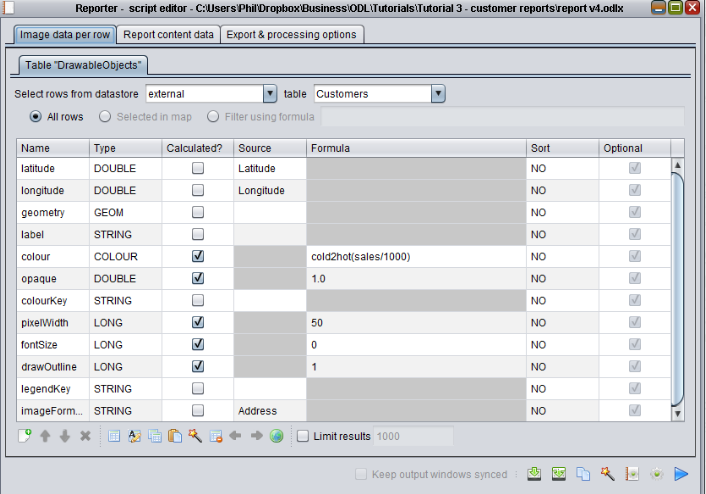
Note we have set Address as the source under imageFormulaKey. This is because we will use the address as a unique key field to link the table generated by this data adapter to the main report’s table.
We will now add this image to the main report. Do the following steps:
- Select the Report content data tab at the top of the script editor and then select the Primary report “Customers” tab underneath this to access our report's text data.
- Add a new column at the end of the table called Location.
- Set its type to be image - by clicking on its type and selecting the image option from the drop down menu.
- Tick the calculated box and set its formula to:
printableimage("Address","Map,DrawableObjects",1, 5,5,200,"minSpanLongitude=2")
Using image formulae can be complex; for your own reports you could instead hire us to help you set these up. For the technically-minded user, this formula does the following:
- Creates a printable image by using the Address column to find objects in the table Map,DrawableObjects (the table we defined under Image data per row) with a matching value in their imageFormulaKey field.
- Sets the image to draw using the standard mode (mode 1 - see the function's definition under the Help menu in ODL Studio for details on modes).
- Sets the image size and resolution to 5cm by 5cm with 200 dots per cm.
- Sets the rendering properties string (the last parameter) to minSpanLongitude=2. The rendering properties is a comma separated list of key-value pairs. minSpanLongitude=2 specifies that the image should span at least 2 degrees longitude (as we want to be able to see the area surrounding the customer).
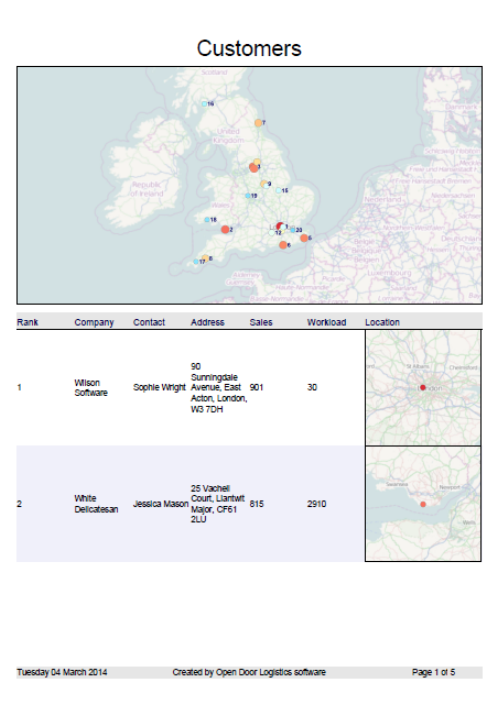
Save the script and run the view basic report function as per the previous steps. After a few seconds, this generates a report with this first page: